Image Editing with Gimp
By B Lingafelter graphics
You don't have to buy and learn Photoshop to edit your digital photos. Gimp (GNU Image Manipulation Program) is an alternative free, open-source application that is almost as powerful as Photoshop, and is available for Windows, Mac, and Linux platforms.
Download the current version of Gimp. Click the Download button and choose the most recent stable version for your operating system.
To run Gimp from a portable drive, pick up Gimp Portable (provided by PortableApps.com).
The Backstory
Bitmapped Graphics
Digital photos are bitmapped graphics. This means they are composed of many (sometimes millions) colored squares, called pixels. Unlike vector graphics, that have handles used to resize them, bitmapped graphics require special tools to select and manipulate groups of pixels.
Some Terminology
- JPEG
- Compressed file format for photos that throws away unwanted pixels. More compression = smaller file size and lower quality
- TIFF
- Uncompressed format – retains all pixels but file sizes can be very large (not suitable for the Web)
- Resolution
- Number of pixels per inch (ppi) – 72 or 96ppi for Web and on-screen display; 300 or 600ppi for print
- Resize (scale)
- Reduce physical dimensions – Enlarging does not generally yield satisfactory results as it requires application to “make up” pixels out of thin air
- Crop
- Cut off edges you don’t want
- Transform
- Flip or rotate an image
- Brightness
- Overall lightness or darkness of all the colors in an image
- Contrast
- Degree of difference between the lightest and darkest color values in an image
- Hue
- Colorcast of an image
- Saturation
- Color purity – increase to reduce gray and intensify color
Configure Gimp for single window display
By default, the Gimp file window, panels and toolbars float independently on the desktop. To dock them in a single application window, choose Windows > Single-Window mode.
Saving/exporting images in Gimp
Gimp's native file format is XCF. Similar to PhotoShop's PSD format, XCF is a very useful format because it stores all information about an image except "undo" information. Images opened in Gimp are automatically saved in XCF format. This means the Save and Save As… commands assume you want layers, channels, and other information to be saved in XCF format so the file can be easily re-opened and edited in Gimp.
To convert an opened image to a specific file format (like GIF, JPEG, PNG, etc.):
- Choose File > Export As… command
- Select location where you want image saved
- Click + button Select File_Type and choose desired file format
- Click Export button.
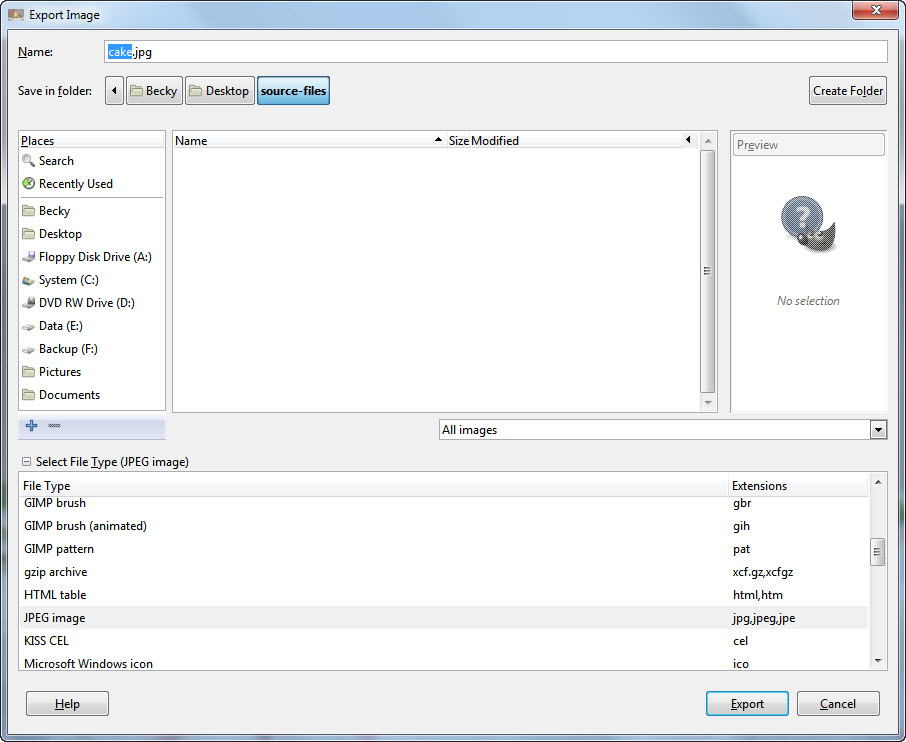
Screenshots of dialog boxes for most common file formats shown below. Click Help button in any dialog box for more information about format options.
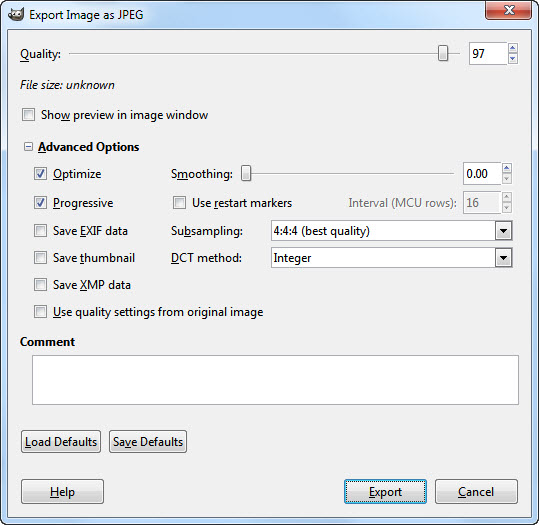
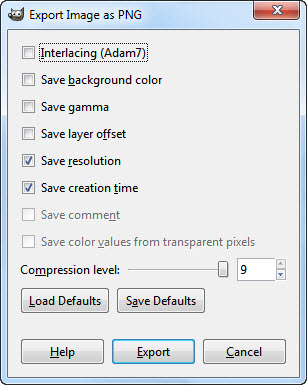
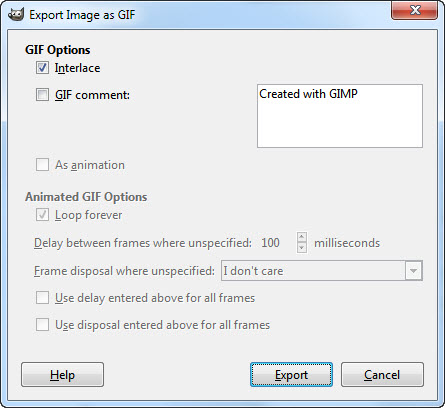
Image Editing Techniques
General instructions for some of the most common image editing techniques listed below. For more specific techniques and tutorials, review the Gimp Resources listed at the bottom of the page.
Crop an image
- Choose Tools > Transform > Crop
- Drag to select pixels you want to keep
- Drag center of selection to move it; drag a corner to adjust size
- Double-click inside selection to complete operation
Resize (scale) an image
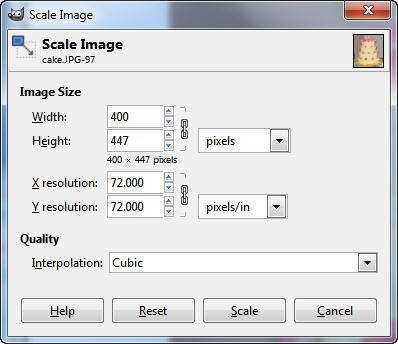
- Choose Image > Scale Image
- Enter desired width or height (link icon indicates Gimp will adjust the other dimension to retain original proportions)
- Click Scale to complete operation
Adjust Levels
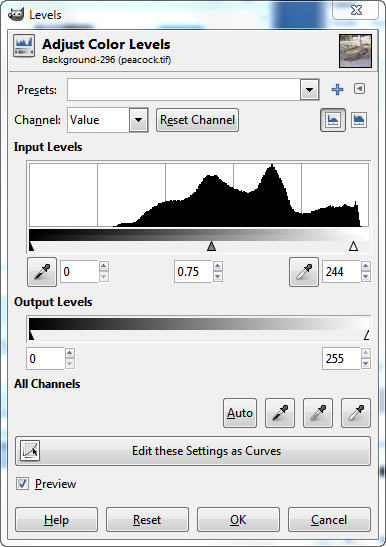
- Choose Colors > Levels
- Under the Input Levels, drag middle point (gamma) to adjust midtones, left point to adjust shadows, and right point to adjust highlights
- Click OK when finished to apply levels
Adjust Color Balance
For color corrections: reduce/intensify color, and remove color casts.
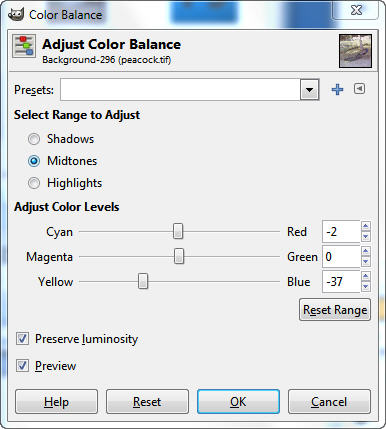
- Choose Colors > Color Balance
- Select Midtones option
- Drag sliders to adjust color cast
- Click OK when finished to apply corrections
Sharpen an image
To correct out-of-focus images and apply sharpening correction to digital images.
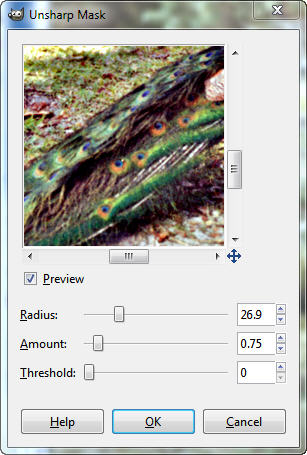
- Choose Filters > Enhance > Unsharp Mask
- Adjust Radius, Amount, and Threshold as needed
- Radius - how many pixels on either side of an edge will be affected by sharpening
- Amount - strength of sharpening
- Threshold - the minimum difference in pixel values that indicates an edge where sharpen must be applied
- Click OK to apply sharpening
Flip, Rotate, and Straighten an image
- Choose Image > Transform
- As appropriate for the image, choose Flip Horizontally/Vertically, Rotate 90° clockwise/counter-clockwise, or Rotate 180°
- For free-form rotation (amount and direction), select Rotate tool in toolbox (Shift+R)
- Click in image with Rotate tool
- In Rotate dialog box, use Angle incrementing buttons or slider to adjust amount of rotation as necessary to straighten image
Remove Red-Eye
- Select Zoom tool and drag around one pair of eyes
- Select Ellipse Select Tool and drag to select red pixels in one eye
- Point inside selection and drag four-headed arrow to move selection, or drag a corner to adjust size

- To select the other eye, press Shift while dragging to select red pixels in other eye (adds another selection)
- Release Shift and adjust size
- Choose Filters > Enhance > Red Eye Removal
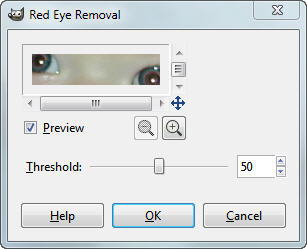
- Adjust Threshold slider and click OK to apply
- Choose View > Zoom > 1:1 (100%)
- If necessary, repeat steps to correct another pair of eyes in this image
Gimp Resources
- Gimp User Manual (English)
- Gimp Tutorials
- Gimp Quickies explains how to resize, crop, flip, and rotate images
- How to Reduce Red Eyes on Photos Using GIMP
- Making Color Transparent in GIF Image from Linux Users Group
- 10 Websites to Help You Master Gimp
- 25 GIMP Video Tutorials to Help Get You Started
- Save for Web plugin - download save_for_web_0.28.6_win32.zip and unzip to temporary location.
To install, copy the webexport.exe to the Gimp plug-ins folder and restart Gimp.
WinXP: Documents and Settings\<username>\.gimp-2.8\plug-ins
Vista/Win7: Users\<username>\.gimp-2.8\plug-ins
GimpPortable: X:\PortableApps\GIMPPortable\App\gimp\lib\gimp\2.0\plug-ins